During the last century, the farm as a societal phenomenon, as well as economical factor, has transformed. A typical farm 100 years ago, would today be considered small scale or homestead. The activities on a farm 100 years ago could span over almost the entire agricultural field, including animal husbandry for several species, vegetable, crop and fodder cultivation, forestry, fishing and fruit foraging, as well as processing the staples into refined and conserved food. These value creating processes was distributed horizontally over several production chains, as well as vertically from raw material and staple production, to refined food and manufactured goods. An economically flexible model, since the cost of switching line of production when one was doing bad, mostly was service based as taken in the learning of a new skill, or hiring another specialist. The modern industrialized farms are most often highly specialized on a few activities, chosen from an economical perspective. If there are grasslands, cow or sheep meat would be a good choice. If there are sedimentary soils, growing crops would be suitable. However, managing farms from an industrial perspective has proven risky, as not only the weather presents unforseeable risks, but also the global market, dependencies on logistics, dependencies on fertilizer and fuel prices and interests on the capital invested in the machine park. The solution to many of these problems has been to scale up and specialize even more, all inspired from other industrial areas. But as the same logistic network that is needed to transport your cattle to a distant meat packaging plant, also can transport meat from a place where it is cheaper to produce, the competition eventually becomes harder. A phenomenon that has greatly reduced the amount of small farms.
That’s all logical. This curve is to be found in all areas affected by industrialization, let be during different periods.The agricultural sector just tends to be a little slower than i.e. manufacturing and raw material sectors, that accomplished the same a few decades earlier.
However, the industrial age is long in the past now. The digital era, the age of information and knowledge, has introduced itself in area after area, leading to transformation of traditional methods, or extinction. Will the huge, specialized and economically vulnerable farms destroy each other ecologically and economically in the competition, and how will our food be produced then?
Pesticides being distributed on a field. Expensive and specialized machinery eradicating the biological environment, as well as the means of its own economical existence. Source: Modern Farmer/Wikimedia commons
One of the many new activities that farm life has brought us is taking in wood from our small but lovely forest. We have yet to optimize this process (having discussed alternatives such as using a horse to drag logs from the forest to the far, as well as buying a quad and bringing in chopped wood after having chopped it in the forest).
For now, we are happy to view this labor as exercise with a purpose – keeping the house warm! There is a primal pleasure in sawing down a tree, sawing it into logs that are the right length for our furnace, chopping the logs into firewood, and then stacking the firewood in neat boxes that are sheltered from the rain. The actual chucking of that same firewood into the furnace takes place at least 6 months from when the tree was cut down – usually longer, the drier the wood is the better!
We primarily take down trees that have broken after a storm, as well as trees that are growing on the very edge of the lake and are sick from too much water. We have a variety of species – a lot of spruce but also more sturdy kinds of trees such as aspen and beech. An added bonus of taking down spruces is that the goats love eating the needles and peeling the bark off the branches, especially now in wintertime when fresh greens are scarce.
As goats are naturally born masters of escaping, we soon realized that the electric fence only should be considered as the first line of defense. Usually, the most clever ones finds their way out, and then calls for the others to follow, and generally, their just heading out to a nearby pasture, where the grass is allegedly greener, or home to the barn. On a few occasions though, they have been spooked by wild boars, and ran off into the forest. When I was tracking them out on a small dirt road, and a neighbor called from his forestry tractor, about 3 km out, and asked if maybe my goats where out hiking, I realized that we have a need for a tracking device. The idea of the GoTo Goat device was born, a GPS-module, transmitting coordinates over the cell network.
The goats where very happy to see me, and followed me home through the forest.
Features:
Real-time GPS location
Upload coordinates to a cloud service, or your own server over GPRS
Step-down regulator: AMS1117 adjustable (5V-3.7V) 1 euro
Sim card (Telia) free
Total cost: 19 euro for the components and 50 for the powerbank, but i bought the powerbank locally in Sweden, and there are much cheaper ones around on ebay. With a little more labour put into sourcing, the cost could probably drop to about 30 euro.
The SIM800L
This is a very nice little module. Essentially a complete cell phone, except for user interface, speaker and mic. It’s controlled from the arduino by sending AT commands through serial communication. The SIM800L is supposed to be powered by a 3.7V Li cell, as in a cellphone, and that’s why the buck converter is needed in this setup to bring the current down from 5V.
The only functionality used here is the GPRS device for sending over HTTP, but using SMS or DMTF for controlling the unit are possibilities as well as calling the goat for an occasional chat.
The NEO-6M
A neat GPS-module supported by the arduino TinyGPS library. Pretty fast on getting a fix, and supplying coordinates once a second.
The Nano
I choose an Arduino nano for prototyping, since it has it’s own FTDI, a reasonable size and a friendly number of pins. If the size, power consumption and prize needs to be further tweaked, I can’t see any reason not to use a mini pro though. The SIM800L is rated for max 3.7V to 4.1V so the internal voltage regulators will be useless.
The SIM
Any sim card that supports GPRS will work, but it’s recommended to use one that not expires too soon after charging. As very little traffic volumes are transmitted, it would be a shame if the card needed to be refueled every 3 months or so. Instead, if you can find one that works for several years, and only using the throttled speed when paid data is depleted, that would be completely sufficient.
Connections
SIM800L pin
NEO-&M pin
AMS1117 pin
Arduino pin
Powerbank
Net – antenna
Usb
Port2
Vcc
Vout
Rst
D5
TX
D8
RX
D7
Gnd
Gnd
Gnd
Gnd
Port1 –
Vcc
5V
Rx
D4
Tx
D3
Vin
Port1 +
SIM800 and nano in the center, NEO-6M to the right. Here, the SIM800 is powered by a 3.7V battery
Cloud API
I choose thingspeak.com as cloud service to store the coordinates. Mostly because I already use it for other sensors, so I’m already familiar with the API. Virtually any online API would be suitable, as long as you can send in values through a HTTP GET parameter.
Thingspeak will let you send in 3 000 000 updates / year with their free account, so that will limit you to 5.7 updates / minute. I’ll go for max 1/min, probably less. Since you are putting the API key in the arduino code, you don’t want to use a service that is likely to go off the market, or become ”premium only”, like Xively did. To be sure that the service stays alive, you could host your own thingspeak platform on a raspberry pi or similar.
Code
The NEO-6M is very simple to interface from the Arduino. I used the kitchensink example from the TinyGPS library, and trimmed it down to the bare necessities.
The SIM800L is more complicated to interface, since you need 2-way communication to ensure that the commands have been successfully performed. I found some example code at Cassiopeia that was very helpful. Even if I do not use DMTF functionality as in the example, their approach for communicating with the SIM800L is very convenient.
As both the NEO-6M, the SIM800L and the arduino IDE Serial monitor are using serial communication for interfacing the arduino, there will be issues regarding which ports to use. I kept the hardware serial (Serial) for debugging purposes, and let only the computer interface with it. For the modules, I assigned two SoftwareSerial ports, sim800 on pin 7 and 8 and ss on pin 3 and 4. To keep the communication channels separated, the arduino is instructed on which one to listen, depending on where input is expected.
#include <SoftwareSerial.h>
#include <TinyGPS++.h>
#include <avr/sleep.h>
#include <avr/wdt.h>
//Thingspeak channel
#define CHANNEL 199082 //Not used
//Thingspeak API write key
#define APIKEY "XXXXXXXXX"//Put your own write key here
//SIM800 TX is connected to Arduino D8
#define SIM800_TX_PIN 8
#define RATE 10000 //GPS sampling rate
//SIM800 RX is connected to Arduino D7
#define SIM800_RX_PIN 7
static const int RXPin = 3, TXPin = 4;
static const uint32_t GPSBaud = 9600;
const int sim_rst = 5;
int errors = 0;
//Create software serial object to communicate with SIM800
SoftwareSerial sim800(SIM800_TX_PIN,SIM800_RX_PIN);
SoftwareSerial ss(RXPin, TXPin);
TinyGPSPlus gps;
unsigned long last = 0UL;
// watchdog interrupt
ISR(WDT_vect)
{
wdt_disable(); // disable watchdog
}
void myWatchdogEnable(const byte interval)
{
MCUSR = 0; // reset various flags
WDTCSR |= 0b00011000; // see docs, set WDCE, WDE
WDTCSR = 0b01000000 | interval; // set WDIE, and appropriate delay

wdt_reset();
set_sleep_mode (SLEEP_MODE_PWR_DOWN);
sleep_mode(); // now goes to Sleep and waits for the interrupt
}
void setup() {
//Begin serial comunication with Arduino and Arduino IDE (Serial Monitor)
Serial.begin(9600);
while(!Serial);

//Beging serial communication with Arduino and SIM800
sim800.begin(9600);
delay(1000);
ss.begin(GPSBaud);
delay(1000);
Serial.println("Setup Complete!");
last = millis()-RATE;
}

void loop() {
errors = 0;
// Dispatch incoming characters from GPS
ss.listen();
while (ss.available() > 0)
gps.encode(ss.read());
if (millis() - last > RATE)
{
if (gps.location.isValid())
{
static const double OFFICE_LAT = 56.000, OFFICE_LON = 14.000; //Hard coded reference coordinates if needed in the future
double distanceToOffice =
TinyGPSPlus::distanceBetween(
gps.location.lat(),
gps.location.lng(),
OFFICE_LAT,
OFFICE_LON);
Serial.println(distanceToOffice);
double courseToOffice =
TinyGPSPlus::courseTo(
gps.location.lat(),
gps.location.lng(),
OFFICE_LAT,
OFFICE_LON);
char tmpCourse[10];
char tmpDistance[10];
char tmpLat[10];
char tmpLng[10];
char tmpSpeed[10];
char params[200];
int batteryLevel;
//Convert GPS data to strings
dtostrf(gps.location.lat(),1,6, tmpLat);
dtostrf(gps.location.lng(),1,6, tmpLng);
dtostrf(distanceToOffice/1000, 1,6, tmpDistance);
dtostrf(courseToOffice,1,6, tmpCourse);
dtostrf(gps.speed.kmph(), 1,6, tmpSpeed);
sim800.listen();//Turn to sim800l channel
disconnectGPRS();//Sometimes, the sim800l gets stuck with GPRS activated, and trying to activate it again will naturally fail.
while(!wakeUpSim800());
if(simOK()){
batteryLevel= getBatteryLevel();
Serial.print("Battery level: ");
Serial.println(batteryLevel);
sprintf(params, "apikey=%s&field1=%s&field2=%s&field3=%s&field6=%d", APIKEY, tmpLat, tmpLng, tmpSpeed, batteryLevel);
Serial.println(params);
//Next three stages are sequential. Error handling means that if the sequence is not completed with less than 5 unsuccessful tries on all stages, there is something wrong, and the sequence is aborted.
while(!initGPRS()&&errors++<5);

while(!initHTTP()&&errors++<5);

while(!putDataToThingspeak(params)&&errors++<5);
errors = 0;
while(!disconnectGPRS()&&errors++<5);
while(!powerDownSim800());
delay(200);
Serial.println("Entering watchdog sleep");
delay(100);
myWatchdogEnable (0b100001); // 8 seconds
myWatchdogEnable (0b100001); // 8 seconds
myWatchdogEnable (0b100001); // 8 seconds
myWatchdogEnable (0b100001); // 8 seconds
myWatchdogEnable (0b100001); // 8 seconds
myWatchdogEnable (0b100001); // 8 seconds
myWatchdogEnable (0b100001); // 8 seconds
myWatchdogEnable (0b100001); // 8 seconds

Serial.println("Resuming operations");
}
ss.listen(); //Turn back to GPS channel
}

if (gps.charsProcessed() < 10)
Serial.println(F("WARNING: No GPS data. Check wiring."));

last = millis();

}
}
boolean wakeUpSim800(){
Serial.println(F("Checking for sim800 module..."));

digitalWrite(sim_rst, LOW); // hardware reset after sleep RST
delay(300);
digitalWrite(sim_rst, HIGH);

// time to startup 3 sec
for (int i = 0; i < 6; i++) {
digitalWrite(13, HIGH); // green LED blink after RESET
delay(250);
digitalWrite(13, LOW);
delay(250);
}

sim800.println("AT"); // check if sim800 module responds
delay(100);
if (sim800.find("OK")) {
Serial.println(F("sim800 module awake"));
return true;
}
else{
Serial.println(F("sim800 module not found"));
return false;
}

}
boolean simOK() { // SIM CHECK OK
Serial.println(F("Checking for SIM card.. "));

sim800.println("AT"); // check if sim800 module responds
delay(100);
if (sim800.find("OK")) {
Serial.println(F("sim800 module found"));

delay(100); // wait for sim800 to settle a bit
sim800.println("AT+CFUN=1"); // operation
if (sim800.find("OK"))
Serial.println(F("Function level 1"));
else
return false;
delay(2000);
sim800.println("AT+CSMINS?"); // check if SIM card inserted
delay(100);
if (sim800.find("CSMINS: 0,0")) {
Serial.println(F("no SIM card found, stop here"));
return false;
}
Serial.println(F("SIM card found")); // continue if SIM card found

Serial.println(F("Allow some time for SIM to register on the network.."));
Serial.println();
delay(1000);
return true;
}
else{
Serial.println(F("sim800 module not found, stop here"));
return false;
}
}

void simReply() { // SIM REPLY
delay(500);
while (sim800.available()) {
char c = sim800.read();
if (c != '\n') Serial.write(c); // replace new line with space
else Serial.print(" ");
delay(5);
}
Serial.println();
}

boolean initGPRS(){
boolean noError = true;
sim800.println("AT+CIPSHUT"); //Ensure GPRS PDP is down before init
simReply();
//delay(1000);
sim800.println("AT+CGATT=1");//Attach to GPRS service
simReply();

sim800.println("AT+SAPBR=3,1,CONTYPE,GPRS");//Set(3) bearer connected(1) to Contype GPRS
if (sim800.find("ERROR"))
noError = false;
sim800.println("AT+CGATT=1");//Attach to GPRS service
if (sim800.find("ERROR"))
noError = false;
sim800.println("AT+SAPBR=3,1,APN,online.telia.se");//Set(3) bearer connected(1) to APN
if (sim800.find("ERROR"))
noError = false;
sim800.println("AT+SAPBR=1,1");//Open connected bearer
if (sim800.find("ERROR"))
noError = false;
Serial.print("initGPRS finished with no errors = ");
Serial.println(noError);
return noError;

}

boolean initHTTP(){
boolean noError = true;
sim800.println("AT+HTTPTERM");
if (sim800.find("ERROR"))
noError = false;
sim800.println("AT+HTTPINIT");
if (sim800.find("ERROR"))
noError = false;
sim800.println("AT+HTTPPARA=CID,1");
if (sim800.find("ERROR"))
noError = false;
Serial.print("initHTTP finished with no errors = ");
Serial.println(noError);
return noError;
}
boolean putDataToThingspeak(char params[200]){
boolean noError = true;
char req[250];
sprintf(req, "AT+HTTPPARA=URL,api.thingspeak.com/update?%s", params);
Serial.println(req);
sim800.println(req);
if (sim800.find("ERROR"))
noError = false;
delay(1000);
sim800.println("AT+HTTPACTION = 0");
if (sim800.find("ERROR"))
noError = false;
Serial.print("putDataToThingspeak finished with no errors = ");
Serial.println(noError);
return noError;
}

boolean disconnectGPRS(){
boolean noError = true;
sim800.println("AT+CIPSHUT");
if (sim800.find("ERROR"))
noError = false;
sim800.println("AT+SAPBR=0,1");
if (sim800.find("ERROR"))
noError = false;
sim800.println("AT+CGATT=0");
if (sim800.find("ERROR"))
noError = false;
sim800.println("AT+CFUN=0");
if (sim800.find("ERROR"))
noError = false;
Serial.print("disconnectGPRS finished with no errors = ");
Serial.println(noError);
return noError;

}
int getBatteryLevel(){
sim800.listen();
sim800.println("AT+CBC"); // battery level
delay(500);
String s = sim800.readStringUntil(',');//Grab the value between the commas
String level = sim800.readStringUntil(',');

return(level.toInt());
}

boolean powerDownSim800(){
boolean noError = true;
sim800.println("AT+CPOWD=1");
if (sim800.find("ERROR"))
noError = false;

Serial.print("SIM800l power down = ");
Serial.println(noError);
return noError;

}
Here are the latitude results from thingspeak, for more, go to the GoTo goat section on the IoT page.
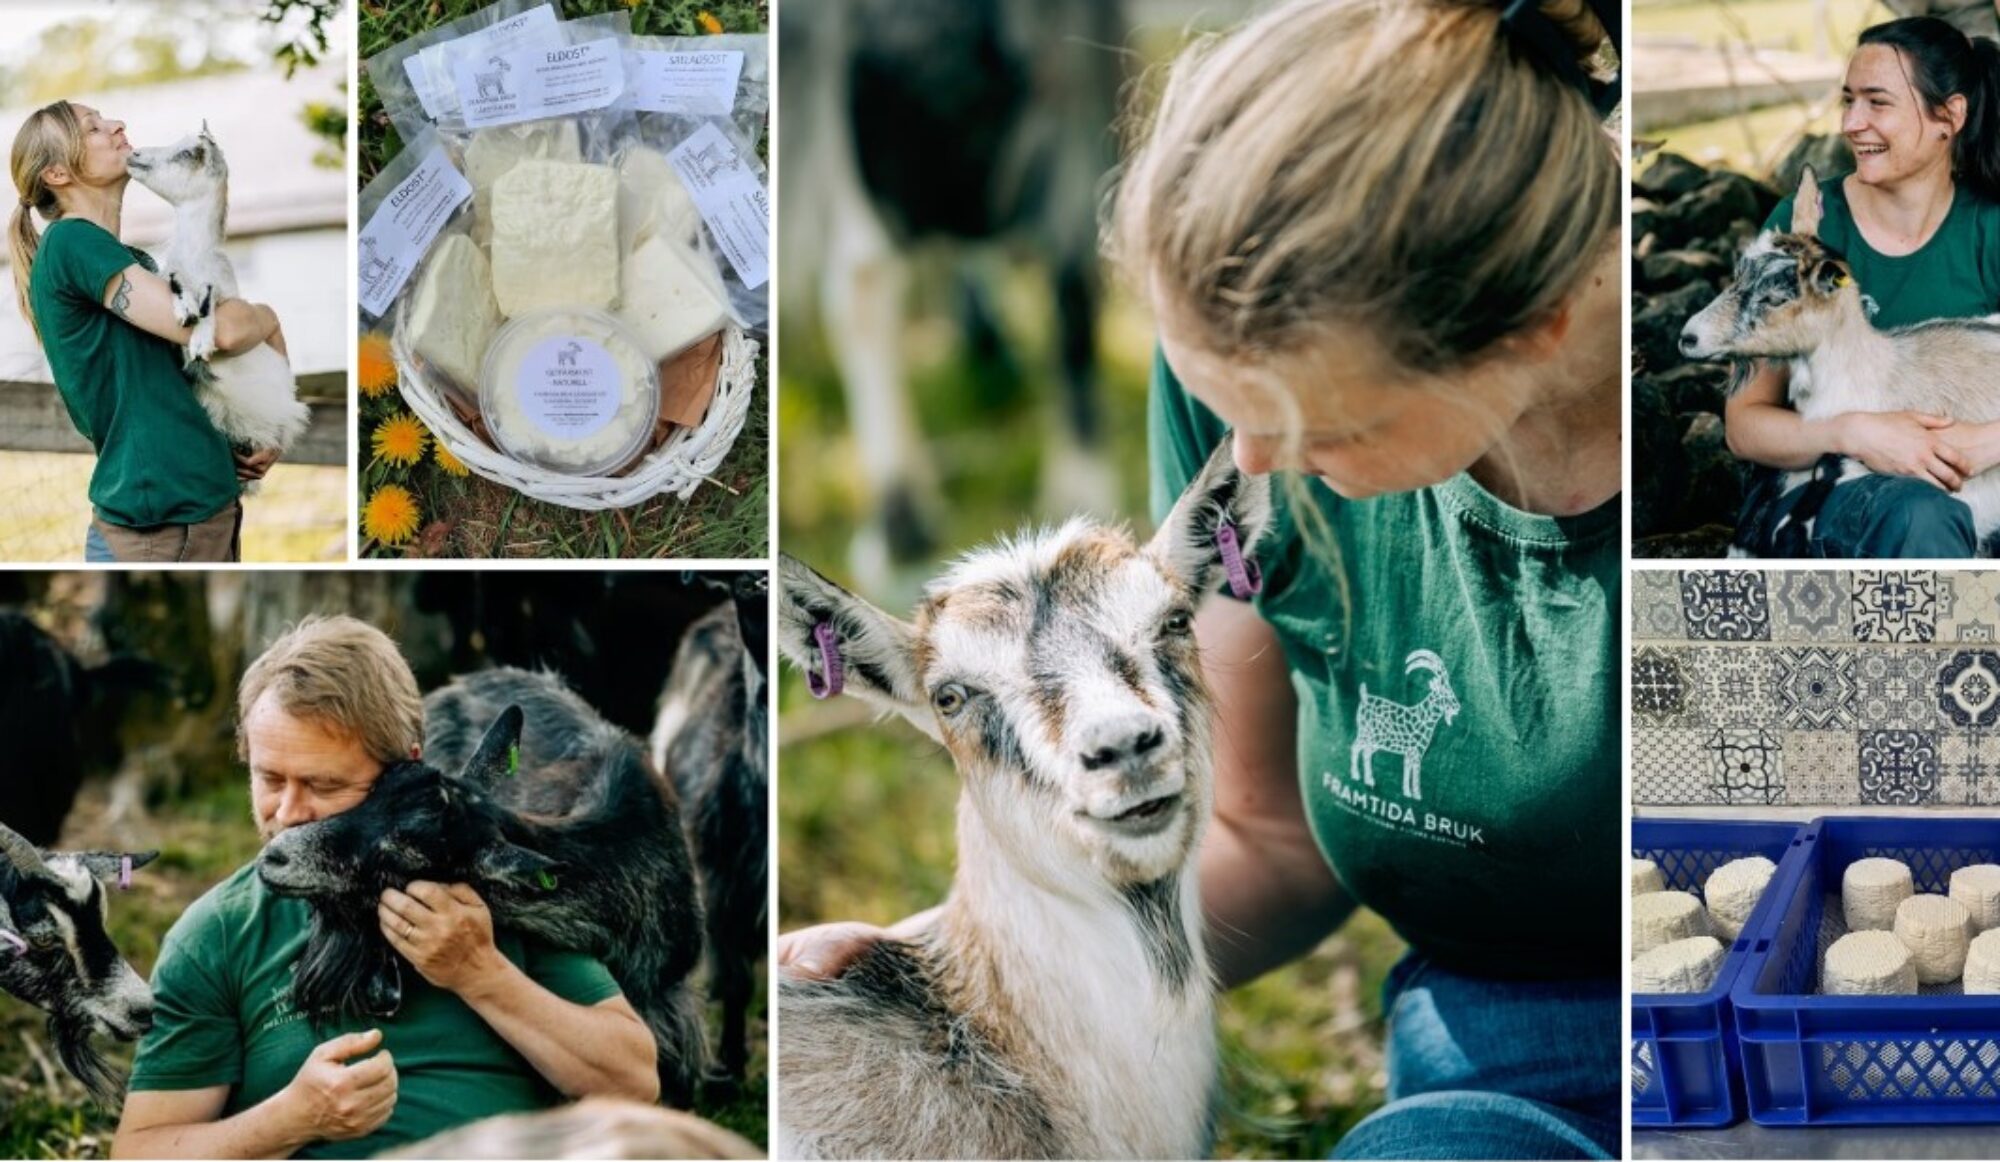
The concept of locally produced food is by nature a very dynamic concept. The self-sustained household would of course provide the most locally produced supplies there are, but since the market would be so limited (i.e. me and my wife), the fixed and overhead costs would be out of proportion to big to us to bear. The concept locally produced will only be economically sustainable if the market defined as local is large enough to create a demand for an efficiently scaled production.
I Sweden, the largest organization for ecological certification (KRAV) describes a geographical radius of 250 km as a reasonable measure used by other actors. But that only means that the final product is manufactured within that radius, not that the crop in the cereals was grown there, or the cattle in the meatballs where raised there. If we control the whole process from goat feed to cheese, and are doing that on the same very local farm, wouldn’t that be more locally produced than meatballs made from Argentinian and Irish beef and sold as Swedish locally produced meatballs, as long as the cheese is sold on a market closer than Argentina or Ireland?
So if the concept of ”locally produced” is stretchy, we can be just as stretchy when finding a market for our locally produced products. Since the concept is neither environmental nor geographical, ”locally produced” should be regarded as a crude economical concept.
Turning the concept towards an economical viewpoint, we get the question: How big market can we reach with our locally produced food still being locally produced? We have a minimum of a 250 km radius from our farm, that by all means is considered local.
Well OK, we got Malmö, Copenhagen and Gothenburg, that’s good, but half of our geographical market is water, and we are missing densely populated parts of Poland and Germany. All our family and friends in Stockholm wouldn’t get our locally produced cheeses, neither would ferry connected towns of Klaipeda and Gdynia/Gdansk/Sopot, where food from just across the Baltic sea could be seen as both local and exotic.
So what’s the actual population in this circle? Eurostat, the statistical office of the EU, provides detailed population data. I should probably create an API-request to get the most accurate result, but a quick mapping of their pre-defined regions (I had no idea that Europe was divided in NUTS, only that a few of them lives here) on NUTS-2 level will be good enough.
The 250 km circle gives a market of approximately 11 million people.
Hovedstaden
1,768,125
Östra Mellansverige
1,621,566
Sjælland
820,480
Småland med öarna
826,243
Södra Sverige
4,211,985
Västsverige
1,942,677
Total Result
11,191,076
Let’s reach out a little, and double the radius. 500 km is the new proposed local market.
Now we’re talking! Stockholm, Oslo, Hamburg and Berlin. Those are some densely populated regions. Along with northern Poland, Denmark, Lithuania and Latvia, we have quite a few local mouths to reach. 43.4 million people to be precise (or maybe not that precise, since Latvia and Lietuva only are 1 NUT each, I counted the whole countries. But I forgot the Norwegian NUT Sörlandet, so that will make up for some of it).
Hovedstaden
1,768,125
Latvija
3,972,192
Lietuva
5,842,524
Lüneburg
1,677,715
Mecklenburg-Vorpommern
3,198,276
Midtjylland
1,282,750
Nordjylland
582,632
Oslo og Akershus
1,232,854
Östra Mellansverige
1,621,566
Pomorskie
2,271,559
Schleswig-Holstein
5,661,728
Sjælland
820,480
Småland med öarna
826,243
Södra Sverige
4,211,985
Stockholm
2,198,044
Syddanmark
1,205,728
Västsverige
1,942,677
Warminsko-Mazurskie
1,418,541
Zachodniopomorskie
1,688,486
Total Result
43,424,105
To view the market as a function of geography and population would of course be to simplify a lot. Culture, communications, currency and concentration of cheese-lovers (the 5 C:s of cheese marketing) are important factors too. But one thing that these figures points out, is that the potential market for physical products, never could have been the same if we had decided to stay in the Stockholm region. In fact, The funny thing is that in Stockholm, we lived in a crowded place, in a sparsely populated region. In Blekinge, it may go several days without seeing other people, even as we have 40 millions of them around the corner.
We bought the farm in Febuary 2015 but did not move here until a little over a year later. We did however spend our summer holidays getting to know the place quite intimately – scraping, spraying, and painting!
This is what the house looked like when we bought it: After brushing the old paint of we rented a skylift named ”Dino” and used a paint spraying machine to do most of the red areas, except for the front of the house which we painted with brushes by hand.
It took us nine full days, working three shifts a day: before noon, afternoon and after dinner. Luckily the weather was quite good for painting, not too hot and it only rained one afternoon. We had a little help from Claires old friend Yasmina – she came to visit and was probably not expecting to be thrown up on the roof to paint as soon as she got here! The result after all the hard work was thrilling:
Since then we have also painted the door green and have put up some lights on the facade to illuminate the garden during the darker season (now in wintertime it gets pitch-black at around 3 pm..)
Happy as clams in our freshly painted house, and happy to have another 10-15 years ahead of us before we need to do it all over again. The barns have yet to be touched up, that will probably be one of our projects next summer!
As you might have noticed we love technology and finding innovative ways to use it around the farm. Nils has a lot of knowledge in programming as well as micro-computers such as Arduino and Raspberry Pi. Claire is an enthusiastic beginner, having participated in courses in Visual Basic, HTML/CSS and Python in the past. Her latest endeavour is to learn more about Arduino which according to the official website: ”…is an open-source electronics platform based on easy-to-use hardware and software. Arduino boards are able to read inputs – light on a sensor, a finger on a button, or a Twitter message – and turn it into an output – activating a motor, turning on an LED, publishing something online. You can tell your board what to do by sending a set of instructions to the microcontroller on the board. To do so you use the Arduino programming language (based on Wiring), and the Arduino Software (IDE), based on Processing.”
Happily, we found that there is a place called Blekinge uppfinnareverkstaddedicated to innovations and co-working in a near-by town called Svängsta, and they offer courses in Arduino for beginners -among other things. It is a really cool place, founded in the 80’s in an old factory and is run on a volunteer basis. Worth a visit (or even membership – 500 SEK for a year) if you are interested in anything from welding to 3D printing. The idea is to use Arduinos for some of the many things we want to monitor and automate at the farm – in the milking process, at the dairy – or even to make a goat locator for when the critters decide to break out of their pasture! We will keep you posted…
Since we both have ”office jobs” it was a priority for us to get a good working space sorted. One of the smaller rooms downstairs seemed like a good option, and since it had a funky smell (hence giving the room the not-so-flattering name ”kissrummet”/”the pee-room”) as well as the floor being way crooked, it felt even more like the best place to start off the interior remodeling. We took out the greenish/brown plastic floor and uncovered some pretty old floorboards and isolating materials which we replaced and built up a little to make the floor more even. Finally we were able to put down a nice new oak floor! After that it was only the small matter of replacing the wallpapers, painting the ceiling, frames, window and radiator and putting up new lamps… We did not get around to finishing the room until October but we were mighty happy to be able to move in our desk!
The walk-in closet adjacent to our bedroom was not initially a priority to renovate, but one day Claire got fed up with crawling around on the floor looking for a pair of socks in the cupboard she had been using to store clothes in since we moved here. ”It will improve our quality of life!”, she exclaimed, and so the project began. We removed the old plastic carpet, took out the frames and steamed/scraped the old wallpapers off. Also, one of the walls needed to be replaced and the chimney-wall needed a good scraping/cleaning as well as a new coat of paint.The first idea that came to mind was a nice, red, carpet, so we built around that, adding a colorful wallpaper and golden frames as a final touch. Since the ceiling is quite low we were not able to install any of the standard wardrobe-systems found at IKEA, and in fact did not want to cover up too much of the nice walls. Instead, we found some regular cube-shaped shelves of the ”Kallax”-model, as well as a curtain-rod for clothes on hangers.
This is what it looked like before:
..and the result – a luxurious little room, where the only regret is that there is not more time to be spent choosing clothes and hanging out in there:
We are happy to introduce a couple of new members here at Framtida Bruk farm: chickens! They are of a New Hampshire dwarf breed and hence they are a bit smaller than regular chickens. For now there are only three of them: Gösta the rooster, who crows proudly every morning, and his two gals Babette and Fabienne who look up to him and like to sleep tucked away under his wing. They are funny, talkative, and often make a little sneeze-hiccup sound when they get up in the morning. The first few weeks they did not seem very happy to be here. They were not producing any eggs, even though they have a spacious pen to peck about in, lots of food and places to sit… They were even looking a bit ragged?! Finally, we realized they were moulting. A few days ago however, we found our first eggs and were beyond happy to enjoy our first farm-egg breakfast.
The reputation of domesticated ruminators as climate culprits has became spread in later years, due to their large emissions of the greenhouse gas methane (CH4). Especially cows in meat and dairy production are considered liable for a remarkable high share of the climate changing emissions, but other ruminators such as sheeps and goats are considered polluters, even if they don’t get as much attentions as the farting cows, as their total emission of carbon dioxide equivalents are lower due to smaller size and lesser numbers.
Hawaii – the most peace loving goat in the world, eating her favorite lunch. Maple leaves.
How bad are goats then? They’re small and cute, smells good (well, a doe does) and never farts loudly in public. Their ability to feed from forage inaccessible to other livestock, like bushes and leaves, makes them a great tool in keeping biodiversity and stimulate growth in young trees and herbs, leading to a greater uptake of carbon dioxide from the air. But do they actually pollute more more than they clean up?
There are actually a lot of studies published on the topic methane emission from goats, mostly from an economical view, since methane emission is considered a loss in energy uptake, that indicates a suboptimal ration.
When I started digging deeper in this issue, I realized that most goats in the studies where fed a completely different diet than our goats are. While our goats grazes freely during the six warm months eating a mix of grass, leaves, bark and needles, and during the winter eats mostly hay combined with spruce and pine needles, the goats in the studies where fed a single feed, chosen for optimizing milk production or feeding costs.
I got the notion that most goats in industrialized production are not getting their natural forage, and if they do, not in a natural mix. I know what usually happens to me when I do that to myself.
This study, Murciano-Granadina Goat Performance and Methane Emission after Replacing Barley Grain with Fibrous By-Products suggests that the ordinary forage of barley grain can be substituted with high fibrous orange peel or soy been hulls, without increasing methane emission. That is a good thing from a economical view, because those by-products probably is extraordinary cheap, but it says nothing about what a natural methane emission is, since all three rations are unnatural to a goat.
Another common mistake is to consider sheep and goats the same, as in this study: Energy metabolism and methane production in llamas, sheep and goats fed high- and low-quality grass-based diets. where goats, sheep and llamas are given a low fibrous and a high fibrous grass and the difference in methane emission is recorded. Only llamas showed lesser methane emission on the high fibrous diet. My conclusion: goats, nor sheep, do not do well on llama food.
What is the source of the methane then? The complex hydrocarbons in the food needs to be broken down into less complex molecules to be possible to absorb for the animal. In a ruminators digestion, this is an extremely complex process, with enzymes, yeast and bacteria working together decomposing those structures. Goats differs from sheep and cows, since they have an extremely fast digestion, giving them the possibility to decompose the most complex hydrocarbons, lignins, found in wood and all durable structures in the world of plants. The key to achieving this is mostly certain bacterial fermentation processes in the rumen. These bacteria seems to be increasing in numbers when the goat eats a lot of roughage, but decreases when the goat eats a lot of starch and sugars. Instead a methane producing bacteria increases when shorter hydrocarbons are digested.
This study: Methane emission by goats consuming diets with different levels of condensed tannins from lespedeza suggest a very interesting view, that in fact tannins are the key to reduce methane emissions. Even if the study is performed on forage consisting of only two species, the forage is more natural to the goat than in the other studies reviewed. The results is that when the goats are fed with a high tannin forage, the methane emission drops quadratically. The adaptation time of 4-6 days to the high tannin forage is another indicator of transformation in the bacterial balance.
In the study, two kinds of forage, sorghum grass and Kobe lespedeza (a legume, like clover or peas) are compared in different rations, 0/100, 33/67, 67/33 and 100/0. Where the 100% grass diet shows no drop in methane emission after 6 days, the 100% legume diet reduced the methane emission by 50% on day 5. After 20 days, the high tannin legume diet remained at low emission rates (from 10.3 to 10.9 l/day), while the 100% grass diet emission rate was drastically increased (from 20.4 to 26.2 l/day).
Tannins are found in many of the goats natural sources of roughage, such as leaves, bark, needles and branches. When the goat is allowed to forage freely in a diverse environment, the level of tannins would be significantly higher than when grassfed or grainfed.
Aren’t those tannins poisonous then? Yes, to cattle, sheep, and especially horses, a tannin fueled diet, such as lots of oak and beech leaves would be lethal. For a goat though, a much higher level of tannins seems to be acceptable. Several studies suggest that oak leaves are not only nutritious and reduces goat gasses, they also reduce nematode infections.
Amanda Karlsson in Effekten av toxiciteten hos ek för get, får och nötkreatur discusses the effects of oak leaves on goats, sheep and cattle, and concludes that oak toxication on goats are not likely, given they have the choice of eating the right amount.
Content of condensed tannins in the studies performed:
Forage
CT g/kg dry matter
Kobe lespedeza
151
Quercus semecarpifolia (himalayan oak)
170
Quercus robur (Swedish oak)
78
Several studies suggest that the amount of tannins in leaves varies over the seasons and peaks in mature autumn leaves, so the figures are just to get an estimation.
Florida, feasting on hazel leaves
How bad is a goat emitting 10 liters of methane a day? At a methane density of 0.656 g/l, that means 6.56 grams/day. Converting with a carbon dioxide equivalent of 25 for methane gives 164 grams of CO2/day, which is about what a medium car emits on a 1 km ride, or what burning 0.7 dl of petrol emits, like running a chainsaw for 3-5 minutes.
So what all this sums up to, is that a goat can be made into a farting climate culprit when fed with the wrong stuff, but keeping the feed varied and close to the goats natural supply will drastically reduce methane emissions and keep the goats healthy, while minimizing losses in energy uptake.
The goats will still emit some methane, but the carbon emitted will come from the current coal cycle and can be compared to burning wood, in contrary to other methods of keeping the landscape open and diverse, as clearing with fossile fueled machines. If the goats provides you with cheese and meat as by products, that will be a bonus for you and the climate.


 After brushing the old paint of we rented a skylift named ”Dino” and used a paint spraying machine to do most of the red areas, except for the front of the house which we painted with brushes by hand.


 The idea is to use Arduinos for some of the many things we want to monitor and automate at the farm – in the milking process, at the dairy – or even to make a goat locator for when the critters decide to break out of their pasture! We will keep you posted…


 The first idea that came to mind was a nice, red, carpet, so we built around that, adding a colorful wallpaper and golden frames as a final touch. Since the ceiling is quite low we were not able to install any of the standard wardrobe-systems found at IKEA, and in fact did not want to cover up too much of the nice walls. Instead, we found some regular cube-shaped shelves of the ”Kallax”-model, as well as a curtain-rod for clothes on hangers.


 The first few weeks they did not seem very happy to be here. They were not producing any eggs, even though they have a spacious pen to peck about in, lots of food and places to sit… They were even looking a bit ragged?! Finally, we realized they were moulting. A few days ago however, we found our first eggs and were beyond happy to enjoy our first farm-egg breakfast.


